If you've never commissioned 3D product work before, the process can feel like a black box. You hand over some reference material, wait a few weeks, and either receive something that looks exactly like your product or something that requires several rounds of revision before it gets there. The difference between those two outcomes is almost always determined by what happens in the early stages of the project — and understanding the process gives you the tools to be a better client and get better results.
If you have commissioned 3D work before and found the experience frustrating — revisions that didn't land, outputs that missed the brief, timelines that stretched — understanding the process in detail will help you identify where things went wrong and what to do differently next time.
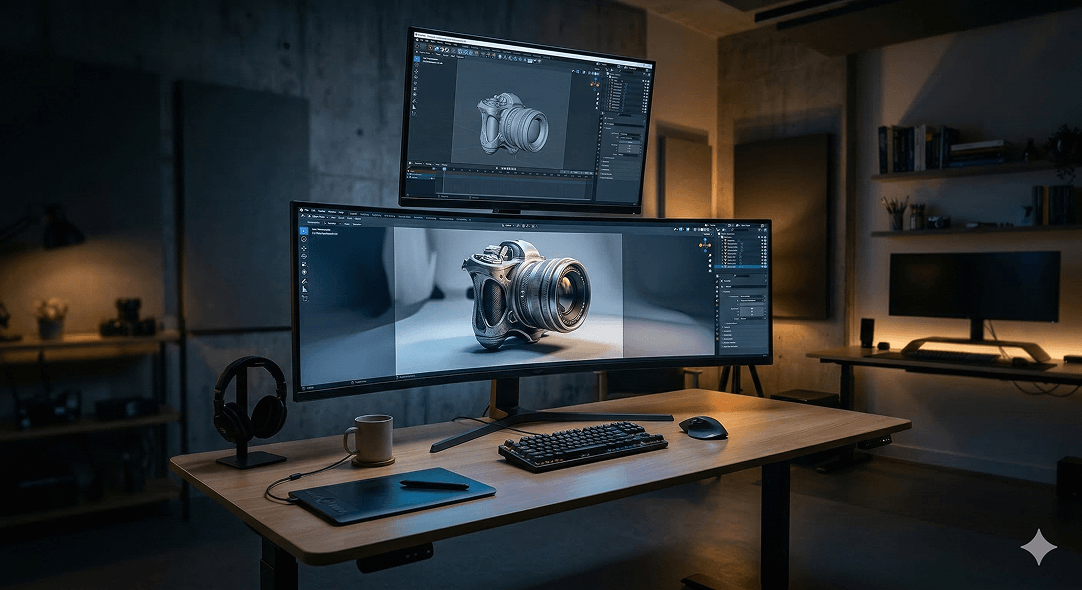
Here is an honest, stage-by-stage walkthrough of what a professional 3D product design process actually looks like from the first conversation to the final deliverable.
Stage 1: Brief and Reference Gathering
Every 3D project starts with information — and the quality of that information determines the ceiling of what's achievable. This stage is where most project problems originate, not because anyone is being careless, but because clients often don't know what information a 3D artist needs and studios don't always ask for it thoroughly enough.
A complete brief for a 3D product project covers several distinct areas.
Product specifications. Dimensions, materials, surface finishes, color references, and any technical details about how the product is constructed or how its components relate to each other. Technical drawings or CAD files are the gold standard here — if they exist, they should always be provided. High-resolution photographs from multiple angles are the next best thing. The more precisely the artist understands the physical reality of the product, the more accurate the model will be.
Intended use of the assets. A render optimised for an e-commerce product listing has different technical requirements than one intended for a large-format print advertisement, a social media video, or an interactive web experience. The intended use determines the resolution, the file format, the rendering approach, and in some cases the modeling level of detail required. Providing this information upfront prevents the frustrating situation of receiving beautiful renders that can't be used for the intended purpose.
Visual direction and references. What should the renders feel like? Clinical and technical, or warm and lifestyle-oriented? Minimal white background, or placed in a contextual scene? Are there reference images — from other brands, from photography, from previous renders — that capture the aesthetic direction you're aiming for? The more specific and visual this direction is, the less interpretation the artist has to do — and the less interpretation, the fewer surprises in the first review.
Brand guidelines. Colors, typography if text appears in the renders, any brand rules about how the product can and cannot be presented. A render that looks visually excellent but violates brand guidelines needs to be redone — catching this at the brief stage rather than the review stage saves everyone time.
A thorough brief session at the start of a project is an investment that pays back many times over in reduced revision cycles and faster delivery of final assets.
Stage 2: Modeling
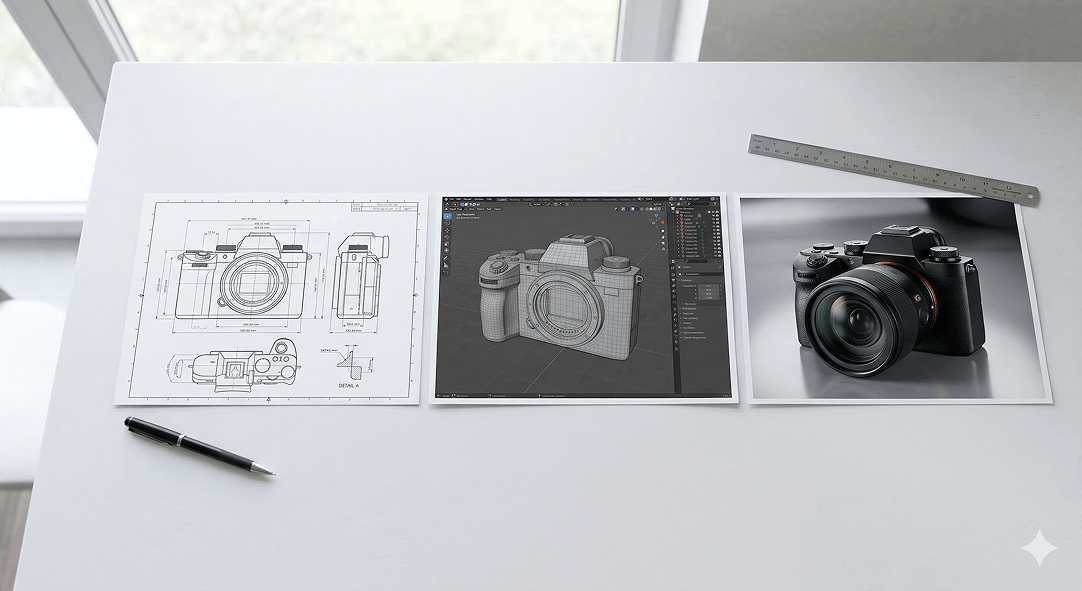
With a solid brief and complete reference material in hand, the 3D artist begins building the model. This is the most technically demanding stage of the process and the one that takes the most time — typically between a few days and several weeks depending on the complexity of the product.
Modeling involves constructing a three-dimensional digital representation of the product using polygon geometry. The artist builds the overall form first, then progressively adds detail — surface features, mechanical components, logos or text embossed into surfaces, joinery details, and any other elements that contribute to the product's appearance.
The level of detail built into the model is calibrated to the intended use. A model intended for close-up hero renders needs significantly more geometric detail than one intended for small lifestyle scene props. Getting this calibration right at the start avoids the twin problems of over-engineering models that will never be seen at full detail — which wastes time — and under-engineering models that look unconvincing at the scale they'll be rendered.
Most professional studios share a modeling preview — a basic render without final materials or lighting — at the end of this stage for client review. This checkpoint exists to confirm that the geometry is correct before the more time-consuming materials and lighting work begins. Catching a proportion error or a missing component at this stage is straightforward. Catching it after full shading and lighting have been applied means redoing work.
Clients reviewing a modeling preview should focus on accuracy and completeness of the geometry, not on how the product looks — it won't look like the final output yet. The question at this stage is: does this model correctly represent the physical product?
Stage 3: Texturing and Materials
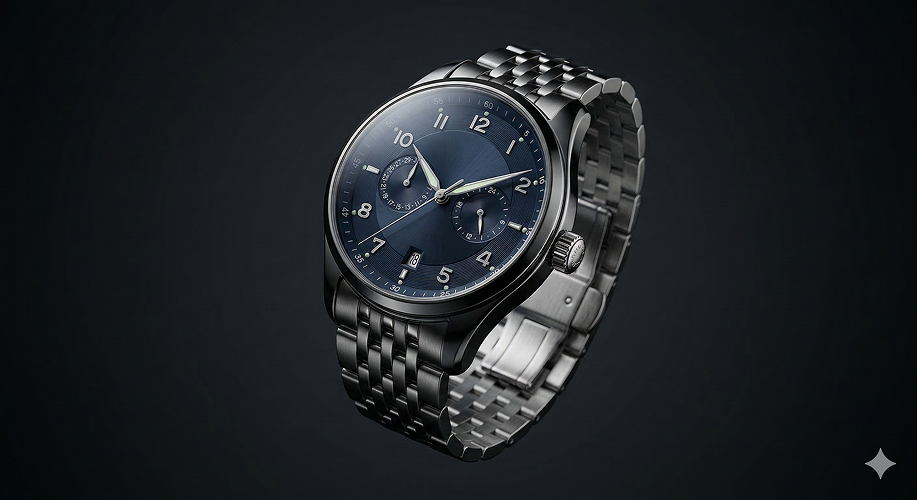
Once the geometry is approved, the artist applies materials and textures — the digital equivalent of the surface properties of the physical product. This is where the model transforms from a gray geometric shape into something that looks like it's made of real materials.
Modern 3D materials use physically based rendering (PBR) workflows, which means each material is defined by a set of properties that describe how it interacts with light in physically accurate ways — its base color, its roughness or smoothness, its metallic quality, how it reflects and refracts light, whether it has a subsurface scattering component for translucent materials like skin or wax.
For common materials — brushed stainless steel, anodized aluminum, matte plastic, gloss ceramic — experienced artists have well-developed material setups that produce convincing results quickly. For unusual or highly specific materials — a proprietary fabric weave, a custom surface treatment, a specific brand color that needs to match a Pantone reference exactly — more time and iteration is typically required.
Surface imperfections are a deliberate part of professional material work. Perfectly uniform, perfectly smooth materials look synthetic. Real products have subtle variation — microscopic surface roughness, slight color variation, fingerprints on glossy surfaces, the grain of a fabric. Adding these imperfections at the texturing stage is what separates renders that look photorealistic from renders that look like CGI.
Stage 4: Scene Setup and Lighting
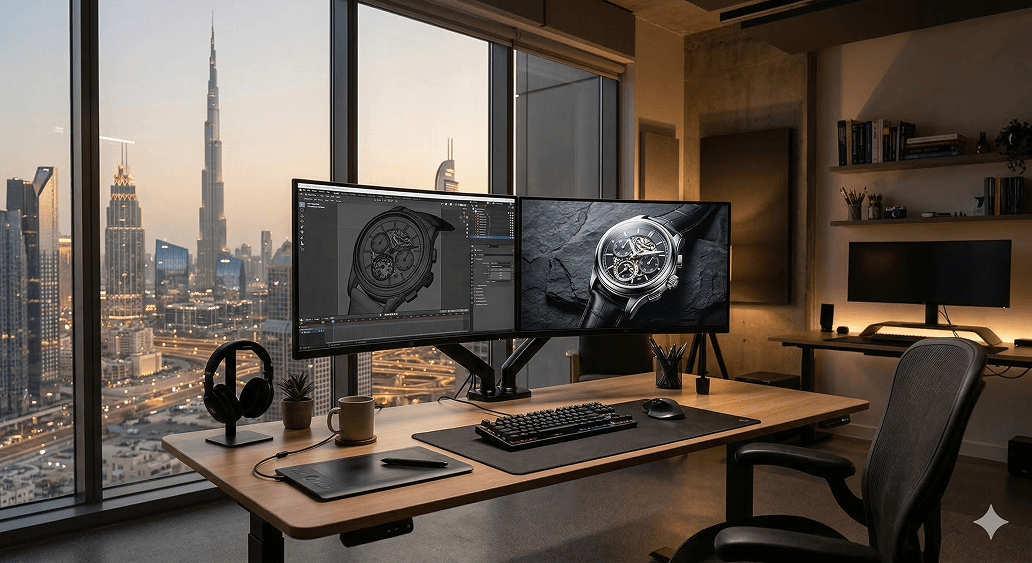
A 3D model with correct materials still needs to be placed in an environment and lit before it becomes a useful visual asset. Scene setup and lighting is where the artistic direction of the project takes shape — and where the difference between technically correct renders and genuinely compelling ones is most visible.
The lighting setup is the most significant single determinant of render quality. Light defines form, creates mood, reveals or conceals surface detail, and determines whether the product looks premium or ordinary. Professional 3D artists approach lighting with the same intentionality as a product photographer — understanding how different light sources, positions, and qualities affect the specific materials and forms of the product being rendered.
For studio-style renders on white or neutral backgrounds, the lighting setup mimics a controlled photography studio — typically a combination of key lights, fill lights, and rim lights positioned to flatter the product's form and highlight its most important features. For lifestyle renders placed in a real or virtual environment, the lighting needs to be consistent with the environment — matching the direction, color temperature, and quality of the light sources in the scene.
HDRI (High Dynamic Range Image) environments are commonly used to provide realistic ambient lighting — a 360-degree photograph of a real environment that wraps around the scene and provides natural-looking light and reflections. The choice of HDRI affects the feel of the render as much as the direct lighting setup.
Camera positioning in a 3D scene works exactly like a real camera — focal length, aperture, and position all affect how the product is presented. The hero angles that show the product most favorably need to be identified and set up deliberately, not discovered accidentally.
Stage 5: Rendering
Rendering is the process of calculating the final image from the 3D scene — simulating the path of light rays through the scene to produce a photorealistic output. Depending on the complexity of the scene, the level of detail, and the output resolution required, rendering a single image can take anywhere from minutes to hours on professional hardware.
Most studios use GPU-accelerated rendering engines — tools like Arnold, V-Ray, Redshift, or Cycles — that produce physically accurate light simulation. The quality of the render is determined by the number of samples calculated — more samples means less noise and a cleaner image, but also longer render times. Professional renders are typically produced at resolutions of 4000 pixels or above for maximum flexibility in downstream use.
For animation projects, rendering multiplies significantly — a thirty-second animation at 24 frames per second requires 720 individual frames, each rendered separately. This is why animation projects require more time and computing resources than still renders, and why render farms — large clusters of machines working in parallel — are often used for animation work.
Clients don't typically interact with this stage directly, but understanding that rendering takes time helps set realistic expectations about production timelines — particularly for large batches of renders or animation work.
Stage 6: Post-Production and Compositing
Raw renders from a 3D engine are rarely the final deliverable. Post-production work in software like Photoshop or After Effects is standard practice for adjusting color grading, enhancing contrast, adding atmospheric effects, compositing renders into photographic backgrounds, adding text or graphic elements, and optimising the final image for its intended output format.
The boundary between render quality and post-production quality is deliberate in professional workflows — some adjustments are more efficiently done in post rather than by re-rendering the scene. Color grading, for example, is typically faster and more controllable as a post-production step than as a rendering parameter.
For e-commerce assets, post-production also involves format optimisation — ensuring images meet the technical specifications of the platforms they'll be published on, whether that's an online marketplace, a brand website, or a social media channel.
Stage 7: Review, Revision, and Delivery
The review process for 3D work is most effective when it's structured. Gathering all feedback on a deliverable before communicating it — rather than providing feedback in multiple rounds — keeps the revision process efficient and avoids the situation where a change made in response to one piece of feedback creates a conflict with feedback that arrives later.
Effective feedback for 3D renders is specific and visual where possible. "The metal looks too dark" is more actionable than "it doesn't look right." Annotated reference images showing exactly what needs to change are more effective than written descriptions. The more precisely you can communicate what needs to be different, the faster and more accurately the artist can implement it.
Professional studios typically include a defined number of revision rounds in their project scope. Understanding what counts as a revision — a change to an approved deliverable — versus a correction — fixing something that doesn't match the agreed brief — helps manage expectations on both sides and keeps projects moving efficiently.
Final delivery formats depend on the intended use — high-resolution TIFFs or PSDs for print, optimised JPEGs or PNGs for web, MP4 or MOV for animation, GLB or USDZ for AR applications. Confirming the required formats at the brief stage ensures the final files are immediately usable without additional conversion work.
What Makes the Difference Between Good and Exceptional
The technical process described above is consistent across professional studios. What differentiates good 3D work from exceptional 3D work is not the software used or the hardware it runs on — it's the artistic judgment applied at every stage.
The decision about where to place a light source. The choice of surface imperfection that makes a material feel real without looking dirty. The camera angle that shows the product at its most compelling. The post-production grade that gives the final image a premium feel. These are judgment calls that come from experience, from a deep understanding of how light and materials behave, and from caring about the output as a visual communication rather than just a technical deliverable.
When commissioning 3D product work, the portfolio of the studio you're working with tells you more about the quality of output you'll receive than any other single factor. Look at the details in their previous renders — the materials, the lighting, the realism of surface imperfections — and judge honestly whether that level of quality is what you need for your brand.
The process gets you to a render. The judgment makes it exceptional.
Ready to see what your product looks like in 3D?
At Joyboy, we take products from brief to photorealistic render with a process that's transparent, collaborative, and built around getting the details right. Start a conversation about your project.